
Fusion
Build titles and motion graphics from nodes, like DaVinci Resolve's Fusion page, key green screen, mask, and keyframe any number, by hand or by asking the agent.
Fusion builds titles and motion graphics from nodes. Pick a template, change the text, and the clip plays on your timeline, in the preview, and in every export. Or ask Vibe for it in plain words.
A Fusion composition is a clip whose picture comes from a small node graph. Generators make images, Merge stacks two of them, and filters such as Transform, Mask, Chroma key, and Glow change what passes through. Whatever reaches MediaOut is what the clip shows.
Start from a template
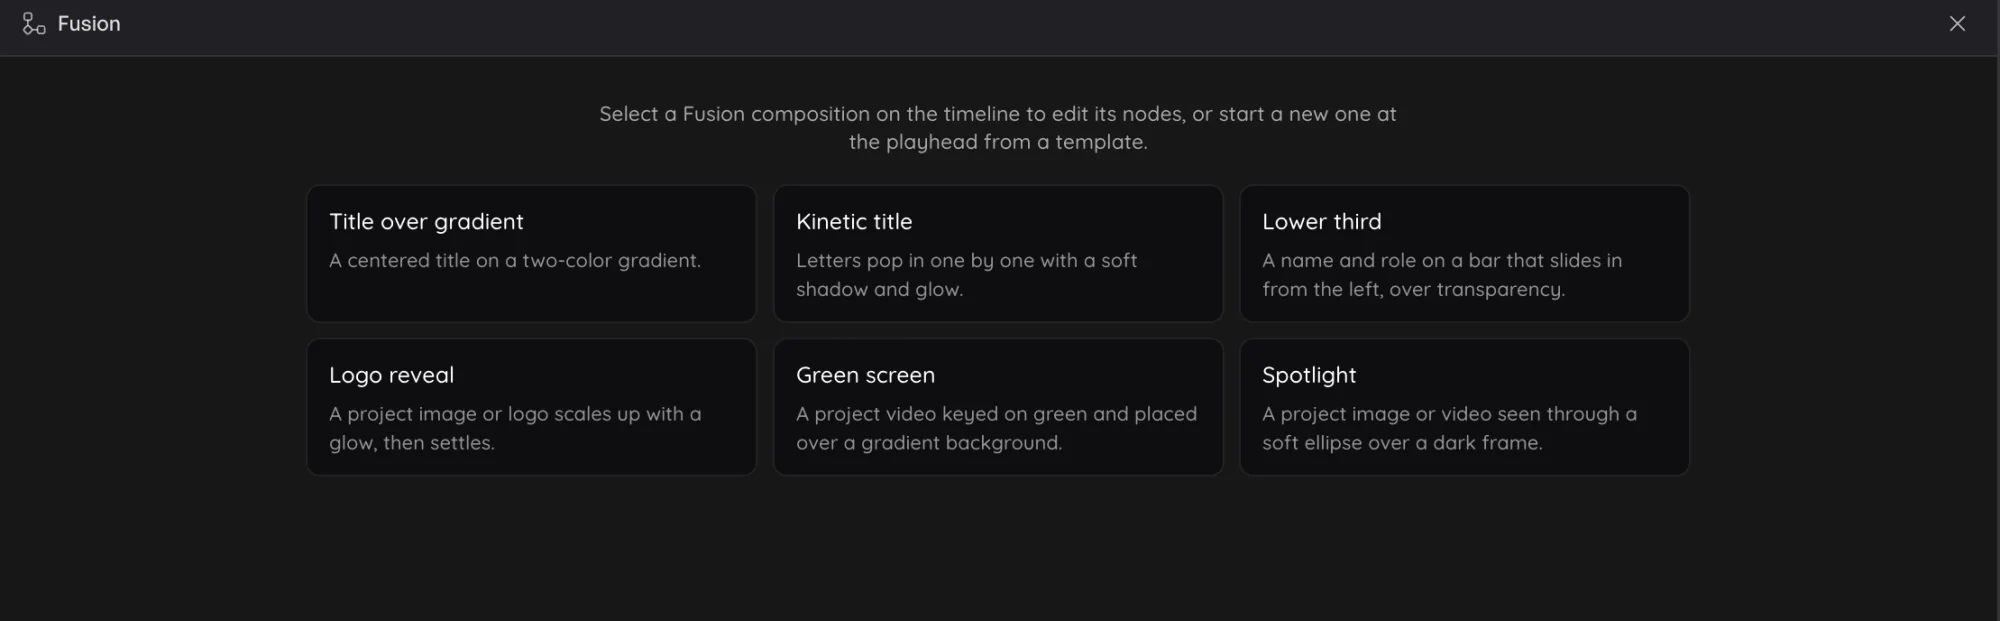
Press Fusion page at the right of the timeline toolbar. The page takes the timeline's place under the preview. With no Fusion clip selected it shows the templates. Pick one to put a five-second composition at the playhead.
| Template | What you get |
|---|---|
| Title over gradient | A centered title on a two-color gradient |
| Kinetic title | Letters that pop in one by one, with a soft shadow and glow |
| Lower third | A name and role on a bar that slides in from the left and out at the end |
| Logo reveal | An image or logo that scales up with a glow, then settles |
| Green screen | A video keyed on green, over a gradient background |
| Spotlight | An image or video seen through a soft ellipse over a dark frame |
Templates that use media start with an empty MediaIn: select it and pick an image or video. Park the playhead inside the clip to see it in the preview. Press the close button to go back to the timeline.
Edit the nodes
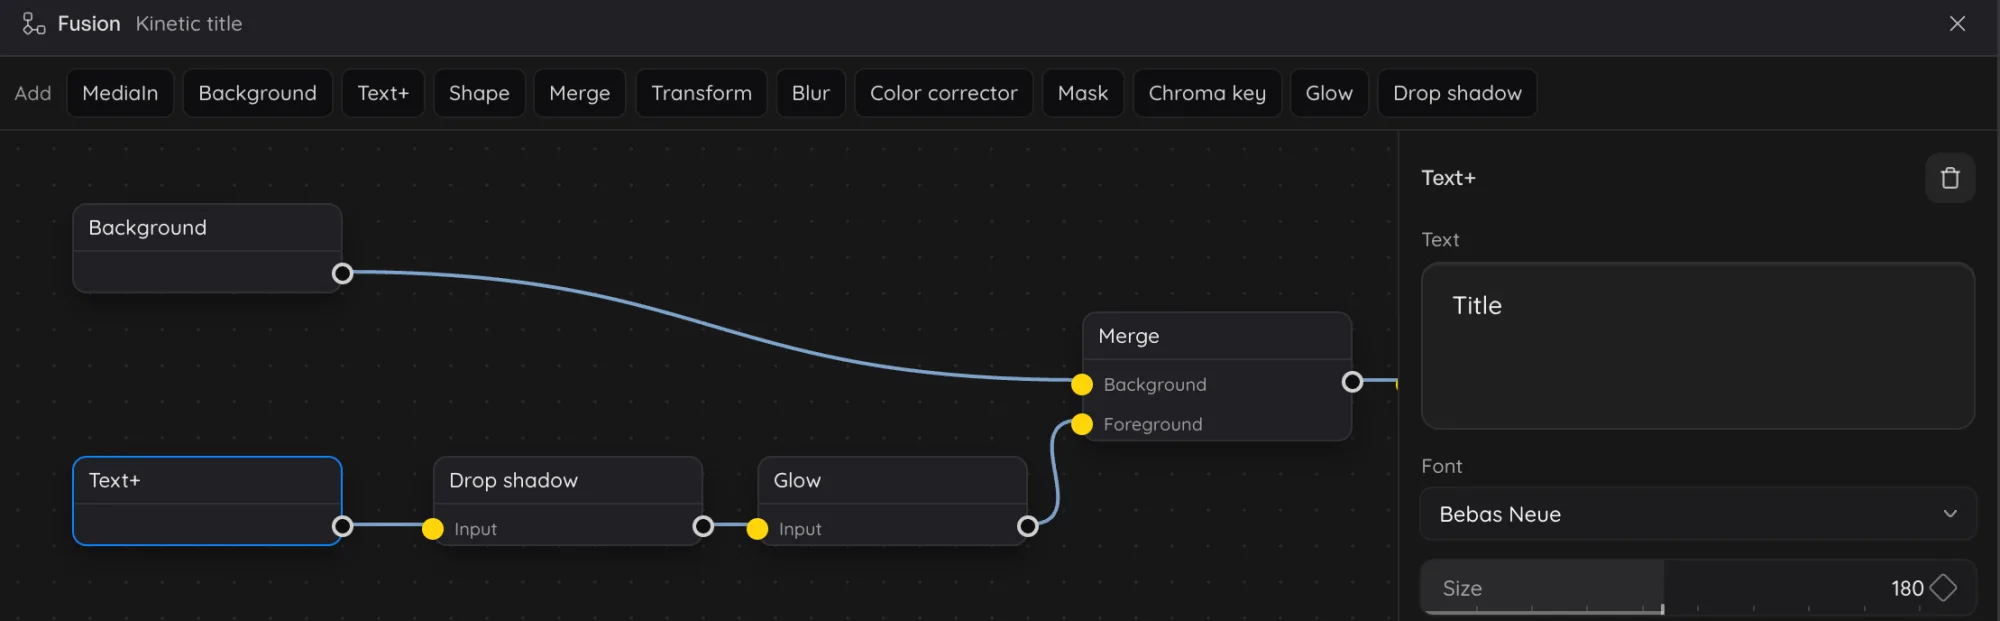
Select a Fusion clip and the page shows its graph. Click a node to edit it on the right.
Nodes
| Node | What it does |
|---|---|
| MediaIn | One of the project's images or videos, fit, filled, or stretched to the frame, then placed by position, size, and opacity. For a video, Start at is the source second shown at the composition's first frame |
| Background | A solid color, or a linear or radial gradient between two colors |
| Text+ | Text with a font, size, weight, color, tracking, and position, and an optional per-letter Animate in |
| Shape | A rectangle or ellipse with a color, size, corner radius, and soft edge |
| Merge | Puts its foreground over its background with an apply mode (Normal, Screen, Multiply, Overlay, Add) and a blend amount |
| Transform | Moves, scales, and rotates its input |
| Blur | Blurs its input |
| Color corrector | Changes its input's brightness, saturation, and hue |
| Mask | Keeps its input inside a rectangle or ellipse with a soft edge, or outside it with Invert |
| Chroma key | Removes a key color (green by default) with a tolerance, a soft edge, and spill removal |
| Glow | Adds a blurred copy of its input on top, with a size and strength |
| Drop shadow | Casts a shadow of its input with a color, offset, blur, and opacity |
| MediaOut | The clip's picture |
Add a node with the buttons in the Add row. In the node editor, drag a node by its title to move it. Drag from a node's output (the white dot on its right) to another node's input (a yellow dot on its left) to wire them; click a wired input to cut the wire. Wires that would make a loop are refused. Select a node and press Delete to remove it; MediaOut always stays.
Text animation
Text+ can bring its letters in one after another from the composition's start. Pick Fade, Rise, Pop, or Typewriter in Animate in, then set Letter delay (the gap between one letter starting and the next) and Letter duration.
The inspector
Selecting a node shows its controls on the right. Each input has a menu of the nodes that can feed it, which is also the way to wire nodes from the keyboard. Numbers are scrub fields: drag to change them, or click to type.
Keyframes
The diamond in a number field keys that value at the playhead. Once a value has a key, changing it sets the key at the playhead (adding one if needed), and the value moves in a straight line between keys and holds before the first and after the last. Click a filled diamond to remove that key. With the playhead on a key, the menu under the field sets how the value leaves that key on its way to the next: Linear, Ease in (starts slowly), Ease out (ends slowly), or Ease in and out. Keys belong to the composition, so moving the clip on the timeline moves its animation with it.
Ask the agent
The agent can do everything above. Ask in Vibe, for example "add a lower third for Priya, Head of Design, in our blue", "key the green screen on this clip and put it over a dark gradient", or "make the title pop in and glow". It starts from the closest template, then adds and wires nodes, sets values, and keys animation. Every agent works with Fusion the same way: Klipeo's own agent, and Claude Code, Codex, Cursor, Gemini CLI, OpenCode, Grok, and Devin, through the Mac app or the bridge.